A few weeks ago I was in my sport school.
Minding my own business. Keeping my distance.
I was called by the manager.
Minding her own business. Closing her distance to the allowed 1.5 meters.
“You are using the wrong liquid to clean the machine.”
My eyes went to the automatic liquid dispenser.
She followed my view:
“You must use the hand trigger sprayer. You used the spray for the hand instead of the machine.”
So what is the problem?
In the previous blog posts about Test Driven Development in test automation I showed how to slowly grow the code. I used the case of a log in form using Red Green Refactor:
- Red: Make a failing test for entering a user name.
- Green: Make enough code to let the test succeed.
- Refactor: Clean up the code.
There is also a password field, so I have to repeat these steps. There are probably more text fields, which lead to similar steps.
Big side step.
At the moment I use the Page Object Model or POM to represent my application. It is a popular model in test automation. This basically means, that every webpage has unique web elements like text fields.
An advantage of this model is that a webpage has his own class or all code in one place. A disadvantage is that code is copied and pasted and therefore harder to maintain.
“You used the same code for all 200 textfields in this web application. Now you have to change at all those 200 places.“
This can go wrong at 200 places and counting.
I wouldn’t be surprised, if it is possible to make some nice class for a text field. But I try to avoid this because of the complications.
Big side step back.
But entering the right username is not very exciting stuff to check. What about no username or a user name with spaces? So I have to check whether error messages are shown. A message can be shown in different ways under the text field, after the text field, or in a dialog.
Filling in a user name in text field could lead to 2 checks:
- does the right text field contain the user name?
- is the right error message shown?
The code to check for the right error message is of course different.
Unfortunately there are many elements on a website like checkboxes and buttons. For every check I need new code to check whether Selenum WebDriver executed the right steps and whether the right error message is shown. That is a lot of code.
It is as cumbersome like using 2 different liquids in sport school to prevent spreading of the Corona virus. For me this was confusing.
So my test automation problem is that I want to check every step in my code, then I need to write new code every time. For the people who are worried about the increasing number of checks I have a spoiler: it is not always needed. See the FAQ in the previous blog post.
For the people who really need to code check for every test automation action; there is a viable alternative.
A solution for the problem
A baseline is an old state which is used to be compared with the new state. This is handy for testing purposes.
I like to play board games with my kids. There is a problem: the kitchen table is also used for dinner. In case of game time shortage I make pictures. That is our baseline. When we want to continue the game we use the pictures to restore the state of game. In case of any arguments the pictures are right.

At the moment there is software to make pictures of my screen during an automated test. Applitools is a tool which uses AI or Artificial Intelligence to compare these pictures.
The advantage of artificial intelligence is that pixel perfect comparisons are not always needed. If the new state differs a few pixels from the baseline, then the test passes. In case of a failed test a human tester must verify the test result. This can save time and energy.
It can be compared with restoring the state of a board game.A ship must lie on the edge of sea tile. If the ship is close enough to 1 edge of a blue tile, then the exact location of the game piece on the tile does not matter.
Disclaimer: I am not paid by Applitools for writing this article.
The first time the code is used this will happen:
- the code fills the username field.
- the code makes a picture of the screen and suggest this as the baseline.
The second time the code will be executed this will happen:
- fill the username field.
- make a picture of the screen.
- compare this picture with the baseline.
- determine whether any differences are acceptable. Only the last step must be executed by a human tester.
In this example I will show the most basic test using Visual Test Driven Development in Test Automation.
Minimal Viable Project
I will describe the steps using Java. You are free to switch to your favourite language and programing tool. Applitools supports other programming languages. On Test Automation University there are several courses for Applitools including installation instructions.
At the moment I will only focus on the combination of visual testing and Test Driven Development. This means that the code can be improved in many ways. Let’s call it a proof of concept.
Java code
For a fast demo I used the Java code on
https://applitools.com/docs/topics/overview/walkthough-example.html#Building
For this blog post I used the following the files pom.xml and TestLogin.java, which can be found in my github. I made a Maven project, which used the XML file. You can use the code to follow along.
I made some adjustments and minimised the code to demonstrate Visual TDD:
- I changed the appName and the testName.
- Because of some execution problem I changed the resolution in viewportSizeLandscape.
- I changed the application under test to http://the-internet.herokuapp.com/login.
- I put the method test01Changed in comment
- I removed some code in the method setup.
In the main method 3 things are done:
- Set up the test.
Applitools is initialised and the URL of the website to be tested is set. - Execute the actual test.
This code is in the method test01. - Tear down of the test.
At the end Applitools is stopped in orderly way.
Red: make a failing test
Let’s start.
// Go to Login dialog.
driver.get(weburl);

// TODO: fill in the username

// TODO: add test.
// TODO: In other words add code for making a baseline and
// comparing the screen with the baseline
// [edited for blog post]
I used the checkWindow method.
For me this was confusing. This method has two possible outcomes:
- If there is no baseline, make a screenprint and suggest it as a baseline.
I could not derive this from the method name. - Compare the screenprint with the baseline and report the test result.
This was the expected outcome of the method.
A better name wouuld be something like compareScreenWithBaselineIfPresentOtherwiseSuggestBaseline.
There is an advantage: I only need 1 method.
So I added checkWindow
// Go to Login dialog. driver.get(weburl); // TODO: fill in the username // add test. // In other words add code for making a baseline and // comparing the screen with the baseline
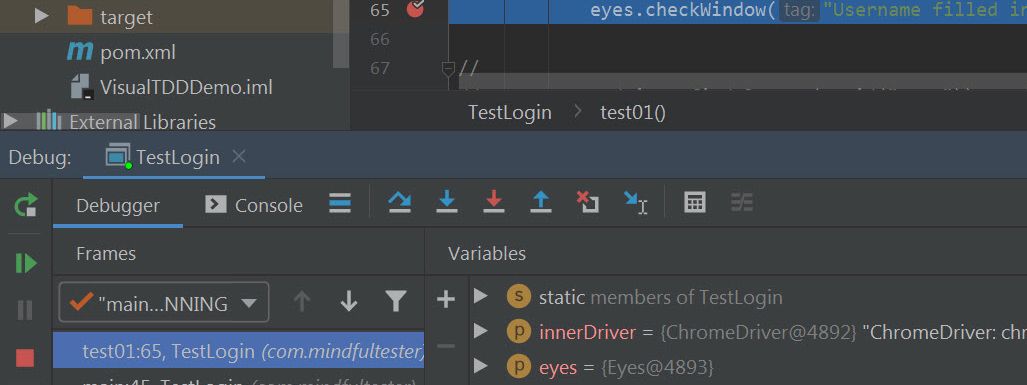
// [edited for blog post] eyes.checkWindow("Username filled in");
and a breakpoint.
![]()
Then I started the debugger .

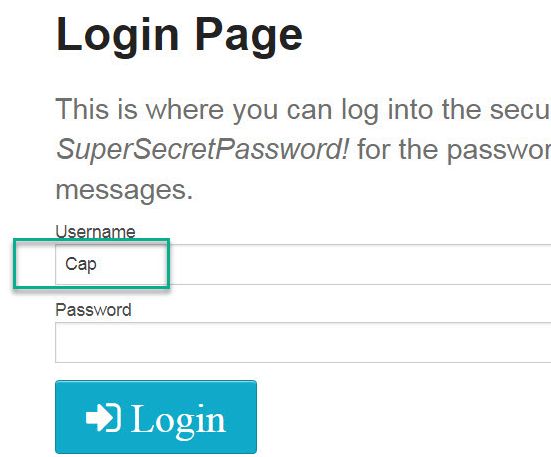
At the breakpoint I entered Cap as user name. Why? Cap can be an abbreviation of Captain Marvel or Captain America.
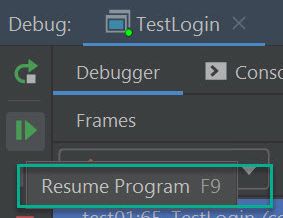
Then I resumed the program.
Now I was curious about the result. I logged in in the Applitools website with my free account,:
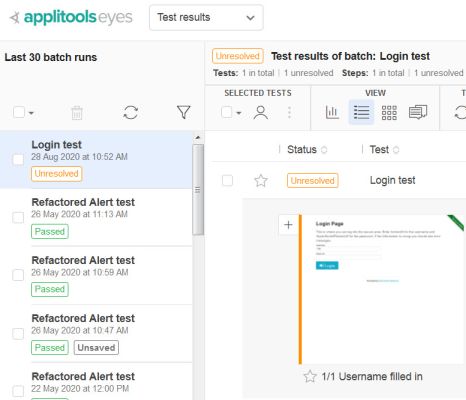
My last batch run showed an orange test result. I clicked on the test result.
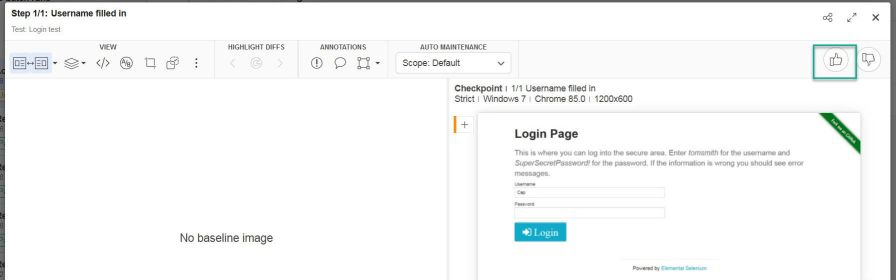
But there was no baseline. So I selectedt he Thumb up icon in the right upper corner.
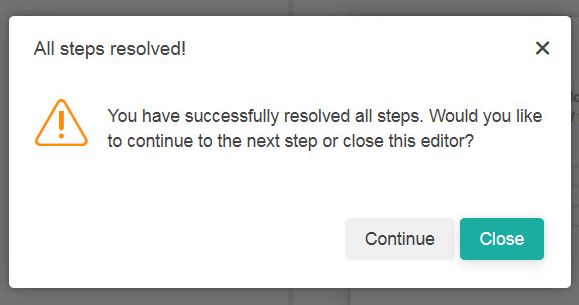
There was only 1 step I had to resolve.
Then I clicked on the Save button or the Diskette button..
What happened?
I made a script which does 2 things:
- Go to login page and
- make a picture of the login with the filled in user name field.
Then I went to a website to set the expected baseline.
Now I had a test with a baseline. But would it fail?
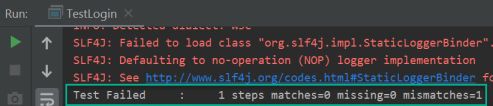
I removed the breakpoint and ran the the program again.
The test failed.
Back to the Applitools portal.
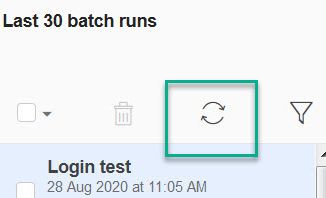
I pressed the Refresh button or the button with the two pointed arrows above the list of batch runs.
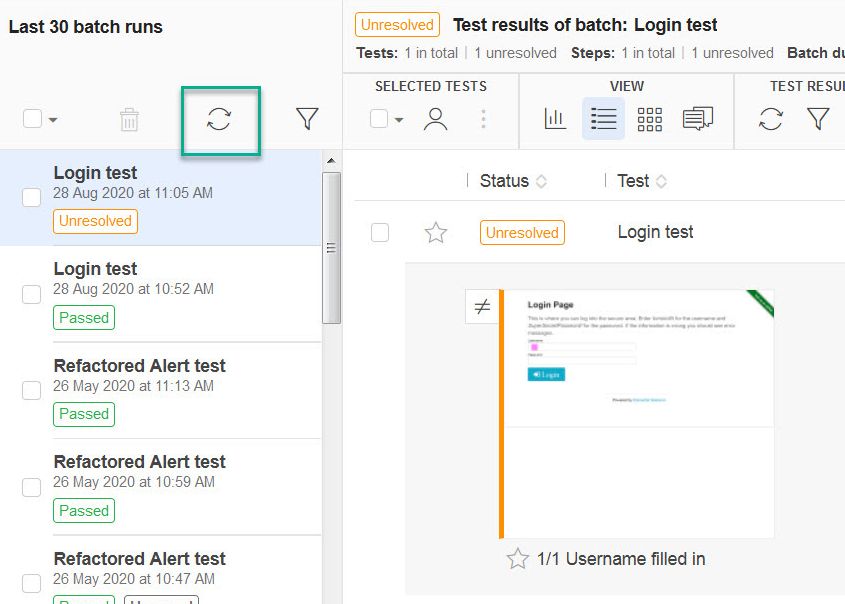
I clicked on the orange test result. The differences were highlighed in pink, because the the button with the Stack of sheets had Diffs checked.
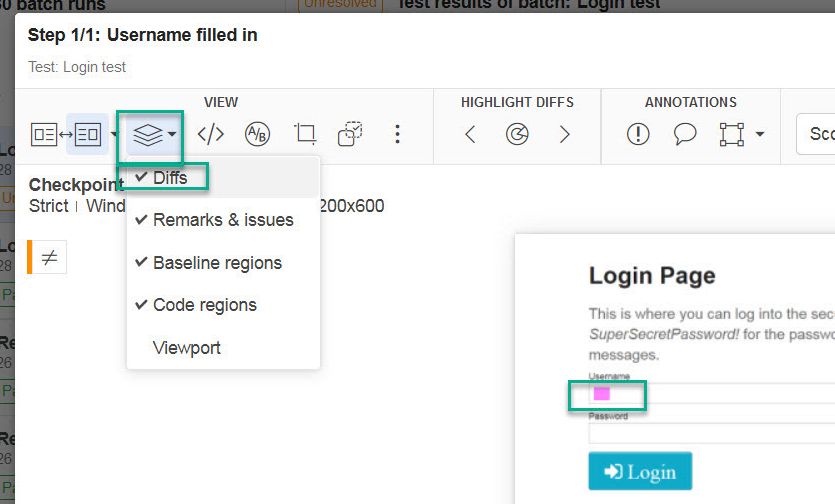
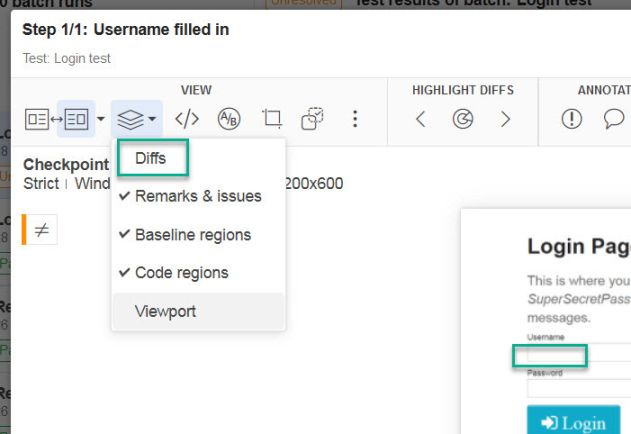
I unchecked the Diffs, so I could see screen print without any pink highlighting.
It was possible to show both screen printes at the same time.
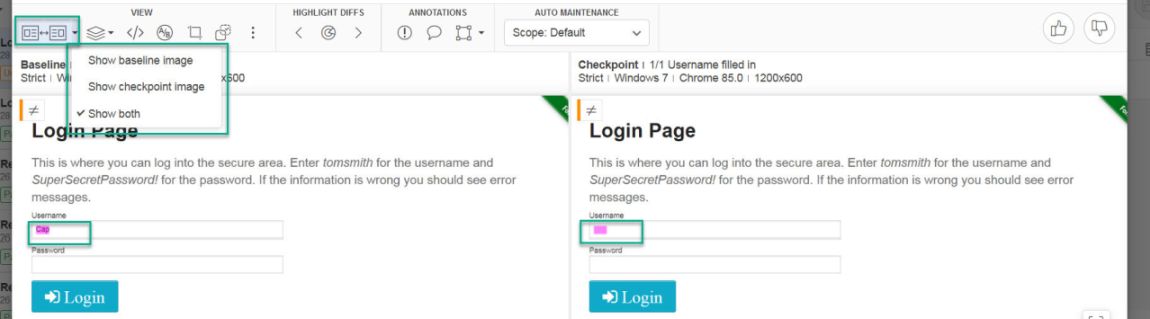
It was also possible to compare the picture without the pink highlighting.

This was expected: a failing test,I clicked on the refresh button.
Then I selected the Thumb down button,
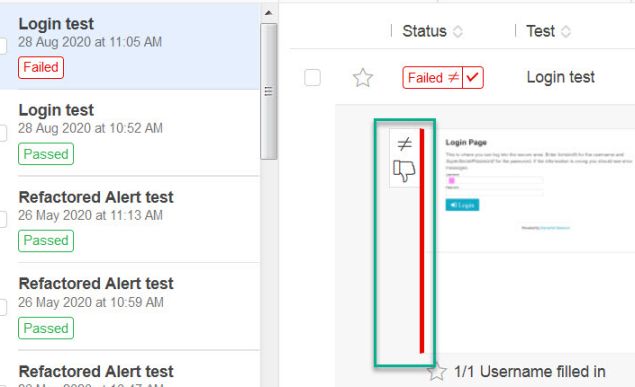
So I had my failing test.
Green: make enough code to make the test succeed
// Go to Login dialog.
driver.get(weburl);

// fill in the username
driver.findElement(By.id("username")).sendKeys("Cap");

// Test.
// In other words add code for making a baseline and
// comparing the screen with the baseline
// [edited for blog post]
eyes.checkWindow("Username filled in");
Remember: checkWindow can also compare the screen with a baseline, if present.
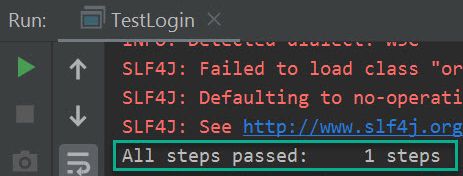
Let’s run the code.
And it passed.
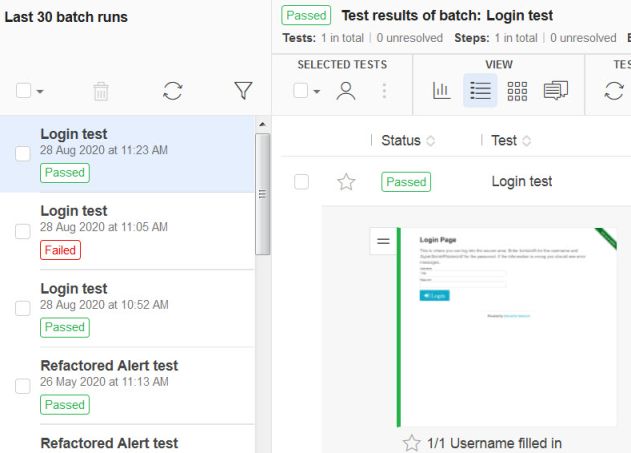
I went back to the Applitools website and pressed the Refresh button.
The website gave the same green test result.
Refactor: clean up the code
For a proof of concept the code is good enough.
Recap
- Red: make a failing test by adding the username test and using a breakpoint.
- Green: add code to fill the username and execute the new script.
- Refactor: clean up the code.
Problem solved?
Did I reduce the number of lines of code to check whether my test automation scripts work?
Probably.
Some people might think:
“One line to rule them all.”
checkWindow for the win.
But you might have notice that extra code is needed for setup, tear down, and report. So that is a trade off.
For this demonstration I did not have to pay for Applitools.
This tool must be paid, if you use a lot of image comparisons.
There is an extra price tag for storing the images on your preferred server instead of the server of Applitools. Something which should be discussed with the legal department.
This case looks complicated with the breakpoint.
In the next blog post I will look to a different solution without using the breakpoint.