
Recap
In order to make this test automation code I used Arrange Act Assert.
- First I had to Arrange, that given my Selenium web driver is in the Form Authentication of https://the-internet.herokuapp.com/.
- I had to Act: when my Selenium web driver will enter the user name and password, and pressing the Enter button.
- I had to Assert: then I got a message that I had entered the right credentials.
I had finished Arrange. The next step was to add Assert. I know that this seems a bit of order, but you are allowed to read the section “Trust”. It would be great that you would return for the technical stuff in the next section.
Connecting Arrange and Assert
My first attempt to make Assert was a failure. It was code which tested my code instead of the code under test.
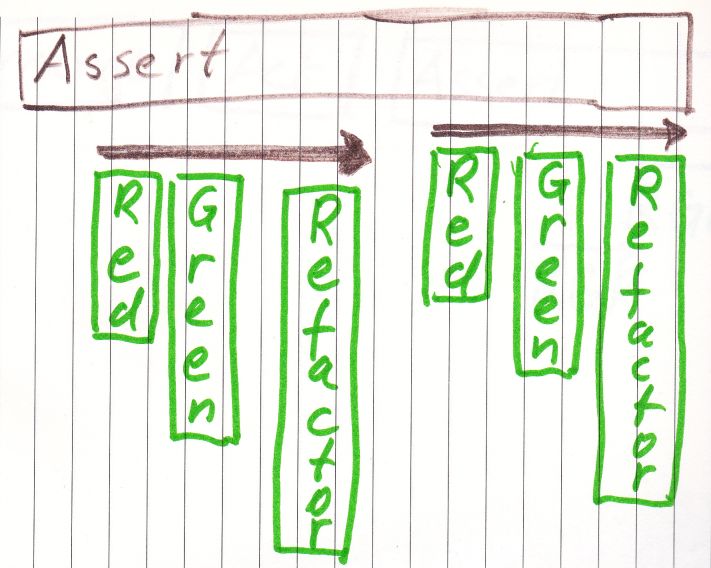
Now I needed to look again to the Red Green Refactor cycle of Test Driven Development or TDD in Assert.
What was Assert supposed to do?
It was supposed to show some message. I had to translate Assert to Red Green Refactor.
- Red: no message is shown.
- Green: a message is shown.
- Refactor: cleanup code.
If it was too difficult for one cycle, I could always use additional Red Green Refactor cycles.
The first step is Red or make a failing test. How did I determine whether the message was not shown?
I looked with my own eyes. Guess what? I had already a failing test.
The second step is Green or make enough code to pass the failing test,
It was time for my rebound. I had enough code in Arrange to make useful code for Assert.
   assertTrue(secureAreaPage.getAlertText()
              .contains("You logged into a secure area!"),
              "Alert text is incorrect");
I could plug in my code like this:
@Test
public void testSuccessfulLogin(){
  LoginPage loginPage = homePage.clickFormAuthentication();
  assertTrue(secureAreaPage.getAlertText()
             .contains("You logged into a secure area!"),
             "Alert text is incorrect");
}
But this would lead to code, which could not be compiled. For starters secureAreaPage was not initialised and did not have a method getAlertText. Code which is not executable can not be tested. The line with assertTrue was unusable.
The test could not be performed, so it is not really a proper Assert.
Now I had to introduce a secureAreaPage.
public class LoginPage {

  private WebDriver driver;
  private By loginButton = By.cssSelector("#login button");

  public LoginPage(WebDriver driver){
    this.driver = driver;
  }

  public SecureAreaPage clickLoginButton(){
    driver.findElement(loginButton).click();
    return new SecureAreaPage(driver);
  }
}
Painful discoveries
While blogging my code looked perfect to me, but my memory was not that perfect. When I coded, I did not use version control system for my personal project at that moment. Luckily I had made short notes in charters. I missed some notes, but I was still able to reconstruct my steps.
Another thing I noticed was, that the code for testBackspacePressed was written before testSuccessfulLogin. I could change flash forward to flash backward. But that would be quite confusing for the reader. So this blog post serie is based on real stories.
Connecting Assert and Act Continued
A way to introduce secureAreaPage in the code is to insert a new line of code:
“SecureAreaPage secureAreaPage = loginPage.clickLoginButton();”
@Test
public void testSuccessfulLogin(){
  LoginPage loginPage = homePage.clickFormAuthentication();
  loginPage.setUsername("tomsmith");
  loginPage.setPassword("SuperSecretPassword!");
  SecureAreaPage secureAreaPage = loginPage.clickLoginButton();
  assertTrue(secureAreaPage.getAlertText()
             .contains("You logged into a secure area!"),
             "Alert text is incorrect");
}
Now secureAreaPage was initialised, but now I had to code a method clickLoginButton.
public SecureAreaPage clickLoginButton(){
  driver.findElement(loginButton).click();
  return new SecureAreaPage(driver);
}
There was still something missing. I missed a class for SecureAreaPage. So I coded a class with a constructor SecureAreaPage and the long awaited method getAlertText. For the newbie programmers a constructor is a method to make object. If there is no constructor, then there is no object to manipulate or test.
public class SecureAreaPage {
  private WebDriver driver;
  private By statusAlert = By.id("flash");

  public SecureAreaPage(WebDriver driver){
    this.driver = driver;
  }

  public String getAlertText(){
    return "ran394594";
  }
}
Notice, that I put in some random text in the method getAlertText. So every time getAlertText is invoked, it will return “ran394594”.
Now comes the interesting part. Let us have a look what happens, if the following line is executed:
assertTrue(secureAreaPage.getAlertText()
             .contains("You logged into a secure area!"),
             "Alert text is incorrect");
secureAreaPage.getAlertText() returns “ran394594”.
This is different from “You logged into a secure area!”,
so the following error message was shown to me:
“Alert text is incorrect”.
So I had finished Green: a message is shown.
The third step of the cycle in TDD is Refactor. The code was already well structured. End of cycle.
Time for a flash forward for another example
@Test
public void testBackspacePressed(){
  // Arrange
  // String header  = "Random text";
  var keyPressesPage = homePage.clickKeyPresses();

  String header  = keyPressesPage.getHeader();
  Assert.assertEquals(header, "Key Presses", "You entered the wrong page.");

  // Assert
  String result = keyPressesPage.getResult();
  Assert.assertEquals(result, "You entered: BACK_SPACE", "Wrong key detected");
}
Stumbling around
Some readers might prefer a straight forward description of TDD in test automation. And yes, I will describe it more concisely in the next blog post. My message is that it took time to adjust my mind to a new way of developing. I had to unlearn things. That is difficult.
Let me clarify this a bit more. Test Driven Development in test automation sounds like programming and testing of programming and testing. It took me a lot of effort to keep the Arrange, Act, and Assert apart from the Red, Green, and Refactor.
Another thing is that blogging this way gives me a better understanding how it works. It is no theory; it is real practice; it does actually work.
Trust
“Never trust a test you have never seen fail.”
I have seen talks of Angie Jones and Bas Dijkstra, two good test automation experts. Their recurring warning is always to see whether the test actually worked. They used Arrange, Act, and Assert in this order. Then they changed Act to see whether the Assert would show an error.
By using the order Arrange, Assert, and Act I know that Assert is testing the right thing. If I will finish my Act in the next blog post, I do not have to change Act to verify my Assert.
A small story to end this blog post
Maybe you remember the story about the walk from the Rijksmuseum to the palace in Amsterdam from the previous blog post. It is not some palace, but a real royal palace is used by the Dutch king and queen.
Lots of kids would go like
“Awwww, white castle with rank towers.
We want to see it!
Now!
Please.”
Only the royal palace is different from the one from a fairy tale. If you are on The Dam, there is no single building looking like that castle of a Sleeping Beauty.
How do I describe this palace to a tourist?
It looks like a grey huge townhall with a dome. This is a way to assert that a tourist is looking to the right building.
Sorry kids for spoiling the fun.
My next blog post is about inserting Act between Arrange and Assert.